As of the date of this post, WordPress reigns as the most popular content management system (CMS) for building out professional, sleek websites. WordPress powers over 25% of the worlds ten million largest websites! And, powers over 59% of all websites online that use a content management system.
Why is WordPress so popular? Simply put, it’s powerful, robust and scale-able. With the vast amount of support and plugins available, you can bring your ideas to life more easily than you can imagine – especially if you’re a developer.
One of the best plugins around for custom WordPress development is that of Advanced Custom Fields. ACF allows developers to custom code virtually any custom layout or design imaginable, and still make those areas editable on any part of the website.
“Well, I can just go ahead and buy a premium theme from Themeforest, slap a logo on and call it day. It takes less time, and it keeps my clients happy. Why should I switch over to using Advanced Custom Fields?”
You could – however, you may realize that there are a few major problems by going with this method:
- Overkill – premium themes are built for the masses. This means that they include a ridiculous amount of features that go unused, as they are overkill. We found our clients were so overwhelmed with vast majority of options available, that they had us update the websites due to being so overwhelmed and not wanting to break anything!
- Poor foundation – they are so poorly built with bloated code, leading to a negative affect on your businesses’ Google rankings
- Big security risks – they are extremely vulnerable to security attacks (the more plugins you have, the more risk – premium themes are built on a plethora of plugins)
- Extremely slow – due to a poor foundation and overkill of plugins, premium themes are extremely slow. What does this mean for you? Simple – slower websites = frustrated users. Slower websites also = lower rankings in Google, as Google uses Page Speed as major ranking factor.
You can see how using a premium WordPress theme is not a good idea.
“Okay, I can see that. So when I use Advanced Custom Fields, how does it square up?”
Easy. Let us compare using the exact same points as above:
- No Overkill – Advanced Custom Fields is one plugin. That’s it.
- Semantic, solid foundation – ACF allows you to code your site from scratch, in the most semantic way possible. It does not get in the way.
- Zero security risks – since ACF is only one plugin (not to mention how well-maintained it is), there are virtually no security risks involved.
- Extremely fast – again – since it’s only one, lightweight plugin, there’s zero bloat. Zero bloat = a very fast website. A very fast website = better ranking in Google, and a great user experience for your customers!
“Wow, I’m sold. Okay so, how do I get started?”
Glad you asked!
What you need to get started using Advanced Custom Fields:
- A fresh install of WordPress
- Install a blank WordPress starter theme on your fresh install of WordPress. We recommend using one of these blank WordPress starter themes, over building a theme completely from scratch (saves you about 1000 hours!). In a nutshell, a blank starter theme includes a base, blank theme that you can easily code upon. Great for implementing Advanced Custom Fields.
- Once you’ve activated your chosen blank WordPress theme on your site, install and activate the Advanced Custom Fields plugin into your website
Once Advanced Custom Fields has been activated, you’ll see it as active on the WordPress Dashboard as, “Custom Fields”.

“Perfect! So what’s next?”
Next up? You need to code out a page! It’s very easy to code out, for example, a home page to use in your WordPress website.
Every blank WordPress starter theme is different – we use BST, which is a Bootstrap-based WordPress theme for all of our client websites.
With BST specifically, it comes with a couple different template layouts – Full Width, Sidebar, and more. The easiest way we found for us, is to simply open up the “page-full-width.php” file, re-name it as “front-page.php”, and strip out all of the code except for the..
- Template name (we re-named this to “Front Page”, you put any name in here you want!)
- Header include (this pulls in the header from your website)
- Footer include (this pulls in the Footer from your website)
..and save the file as “front-page.php”.
After all was said and done, we were left with this:
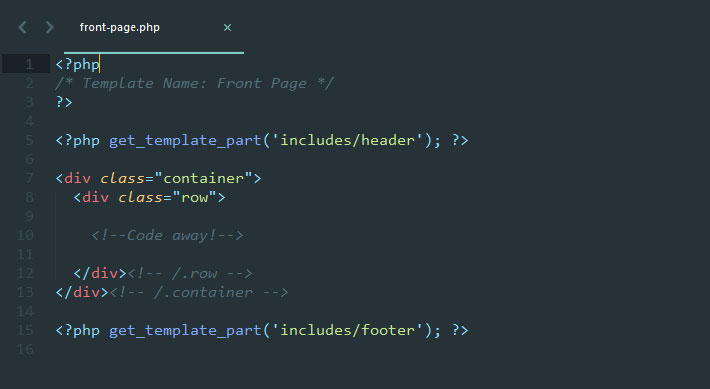
So what we have here, is a base page as a blank canvas, ready for coding!
“Okay great! So now that I have a base, how do I actually get it to show up on the front page of my WordPress website?”
Simple! Notice in the screenshot above where we called the “Template Name” as “Front Page”? All you have to do now is:
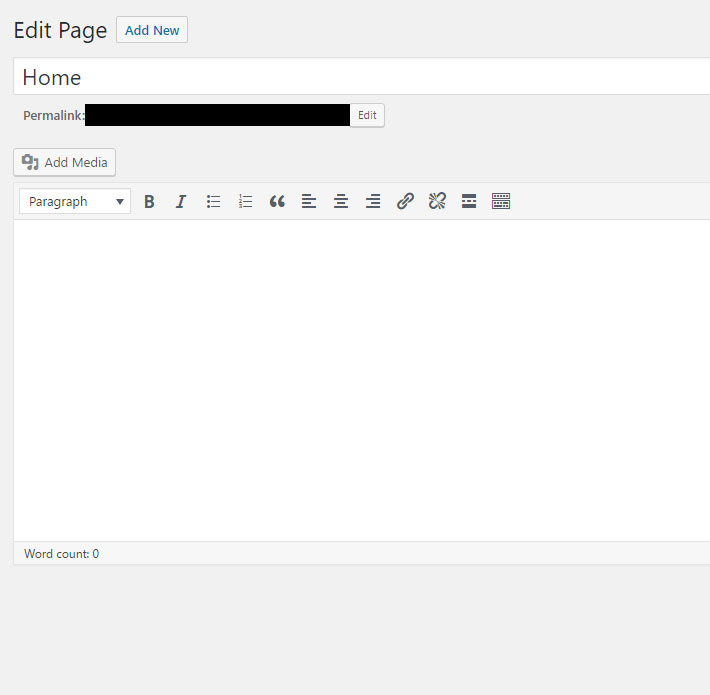
Make a new page in the WordPress back-end that will be your home page (we will call it “Home”):
Assign this page to the template we just created, “Front Page”:
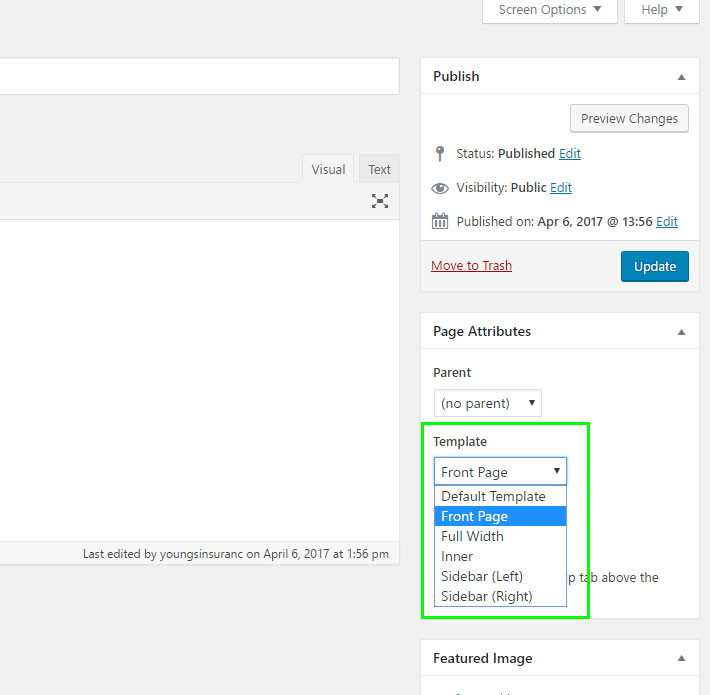
Hit the blue Update button.
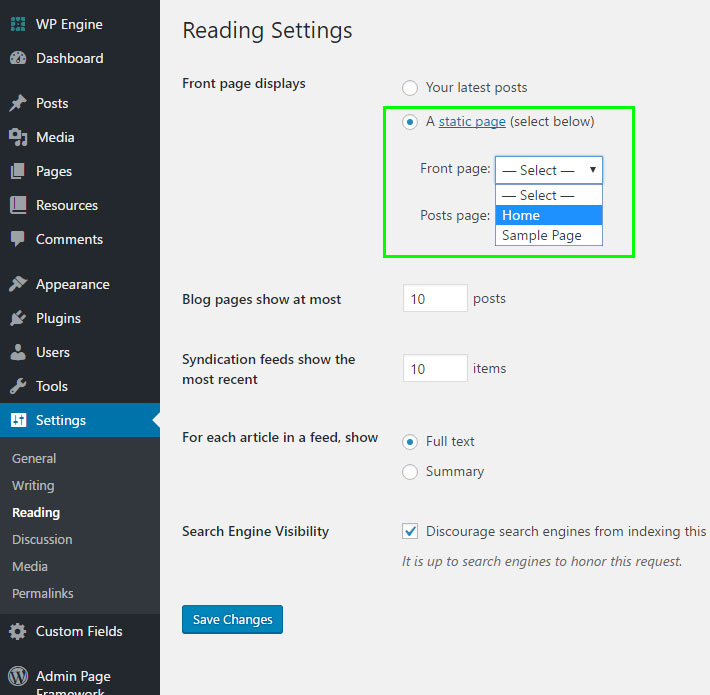
Then, head over to Settings > Reading, and beside the “Front page displays” area, check the “A static page” radio button. Then, beside “Front page”, select the page we just created, which is “Home”. Hit Save Changes, and now your new Home template is assigned to the front page of your WordPress website!
“Awesome! So now that my front page is set, the front of my WordPress website is blank. What gives?”
Well, as you can see in our screenshot, we haven’t coded anything out yet!
Lets code out a very basic web page, for testing purposes.
Here’s the code we created on the front-page.php file:
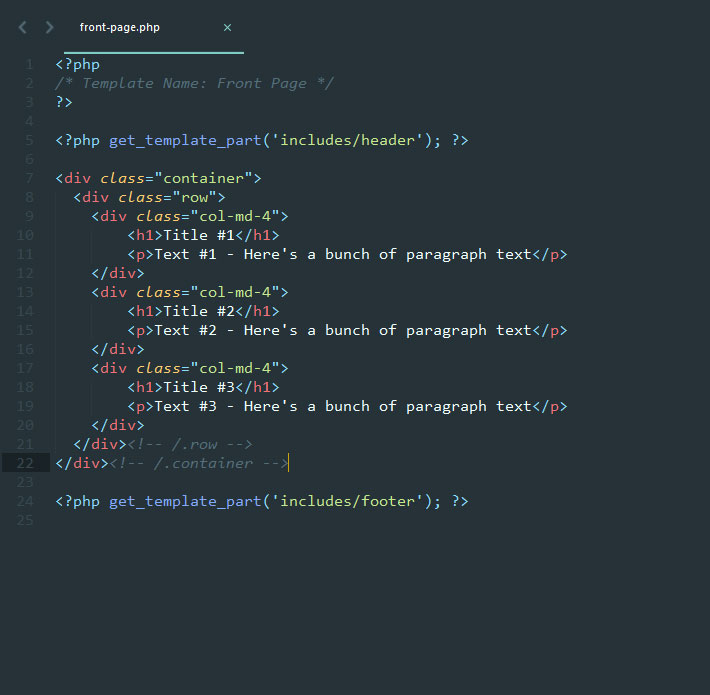
Pretty basic, right? One row, three columns, each with a title and some text.

Implementing Advanced Custom Fields
So now that we have our basic page coded, it’s time to implement ACF!
Head on over to your Dashboard, click on Custom Fields > Add New. This will open up a new Custom Field for you to create. In this specific case, we’re adding editable fields to customize for the Home page. So, we will call it Home.
Next, we will assign the Page template to being equal to the Front Page template, and we will then hit Publish in the top right corner. You can’t see the Publish button in the screenshot, but it is there.
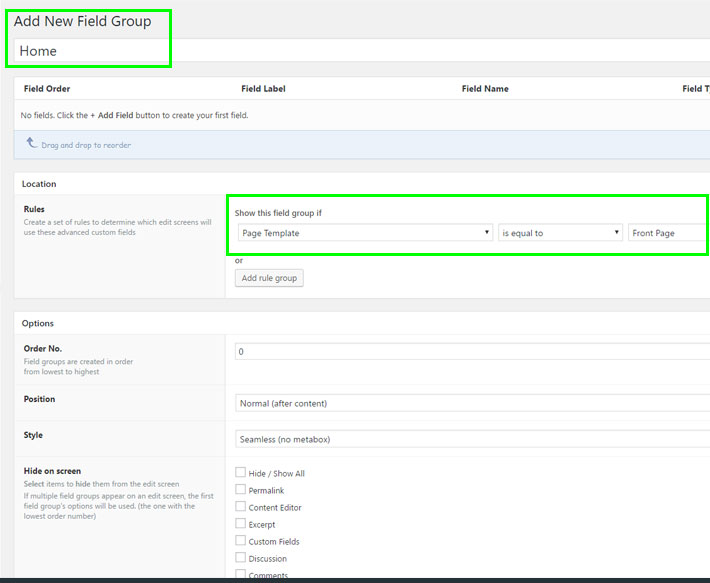
At this point, the custom fields will be assigned specifically to this page. Great!
Next up, we must create the fields that will be editable.
In the screenshot above, you’ll see we created a three column row, each column having a title and some text. We want all those areas to be editable.
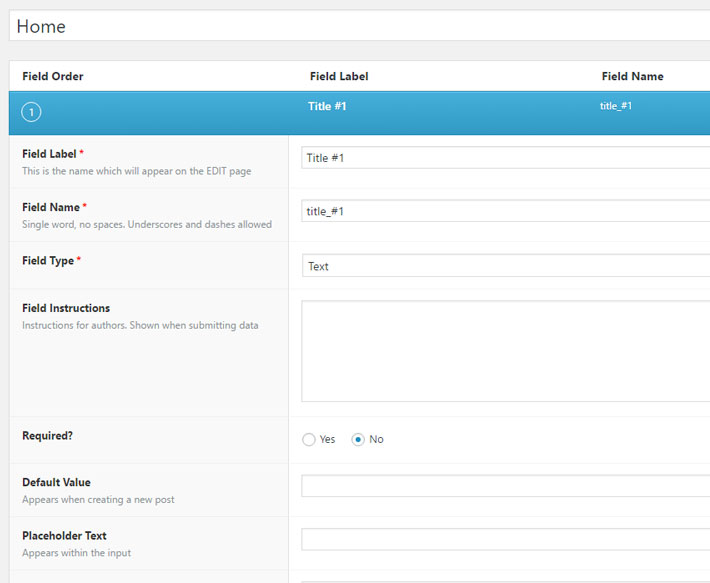
Lets first create “Title #1” as an editable field.
Click the Add Field button. Instantly, you will be presented with a new field.
Fill in the Field Label, Field Name and Field Type, as shown in the screenshot below. Hit Publish. Now, you’ll see that your Title #1 field has been saved.
Next up, lets create Text Area #1, which will be the text in the first column.
Same process, just rename the phrases and change the Field Type to Text Area instead.

Hit Update.
Perfect!
Now, head on over to Pages > Home, and you’ll see two new field areas! These are the areas we just created.
Lets go ahead and fill in those areas with a new title, and new text:

Hit Update on the top right.
At this point, your site will not reflect the changes that we currently just made. We’ve added the content to the home page in the WordPress back-end, but we still have to link it up in the PHP template file.
ACF uses specific PHP codes to do so, you can see the specific documentation on how to implement text, text areas, images and more, by clicking here.
Since we’re dealing strictly with text, we want to insert the text-specific ACF code into our PHP Front-Page.php template file. You can find this specific code at the bottom of this page.
So, let’s take a crack at it!
Let’s enter the ACF text-specific PHP snippet into our front-page.php file.

Notice what I did there?
I entered the specific field name of the fields we created, inside the quote and brackets within the PHP snippet!
Where do you find this field? Go back to Custom Fields > Home, and then you’ll see “Field Name” right beside each Field Title. Simply paste that Field Name inside the quotes, inside the brackets, save your PHP file and view your site!

That’s it! This shows you how powerful Advanced Custom Fields can be. You can literally design your website any way you’d like, without the bloated code. The flexibility here is very powerful.